Monday, December 30, 2013

A Very Quilty Christmas

It's so wonderful to have a hobby obsession for your loved ones to focus on at times when gifts are exchanged. This year my Christmas presents focused very heavily on quilting. It feels a bit like bragging, but one of the ways I use my blog is to remind myself of things. My loved ones know I don't have the greatest of memories and I want to be able to look back and see what I got for Christmas this year and who gave them to me. If you stick with me to the end of this post I plan to share one of my goals for 2014 and how this blog will change.

I got some curved safety pins, a tool for opening safety pins, needles, and storage drawers (not shown) from my parents. My sister got me a set of 50 colored pencils. This one may not immediately be obvious as a quilting notion, but I'm finding myself sketching quilt patterns by hand a lot. (For those interested in my design methods it depends on the pattern whether I start this way or in EQ7, but my final draft is always done on the computer.)


I got lots of books and magazines. The Quilter's Patchwork Album and Easy Quilting is from my in-laws. The free motion quilting books and a subscription to Love of Quilting is from my parents, and the McCalls Quilting magazine is what happens when your husband gives you permission to buy your own stocking stuffer.

If you remember my Penguins on Parade quilt you'll know that I have love penguins. My husband found this adorable penguin shaped martini shaker. I suspect this will come in very handy on days when I use the seam ripper more than the sewing machine.


And finally my husband got me The Farmer's Wife. This brings me to one of my goals for 2014. I want to improve my piecing skills. I've decided the way to do this is to make the Farmer's Wife quilt next year. There are 111 blocks in this quilt which works out to 2 blocks a week with 7 left over. Some of the blocks are rather simple so I figure those weeks I'll tackle 3 blocks. 


I don't like sharing my goals for the new year. (Don't ask why I like the word goal better than resolution. I know they're the same thing, but goal seems much more attainable.) The reason I'm sharing my Farmer's Wife quilt goal is that I'm going to change my publication layout this year. Currently I publish Wednesdays on knitting and sometime in the weekend on quilting. I'm going to try moving to three posts a week. Miscellaneous Mondays will focus mostly on my other quilting projects, but they're miscellaneous so that I can share other things if I want to. Plus I love alliteration. Wednesdays will remain Work in Progress Wednesdays where I'll still share my current knitting projects. Fridays will now be Farmer's Wife Fridays and I'll show you the blocks I got done that week. 

I know that setting lofty goals sometimes means failing, but I don't like everyone to know when I fail. This is probably why I don't share my new year's goals with anyone other than my husband. I will however share my goals for 2013. This year I wanted to get a quilt pattern on the moda bakeshop (Into the Woods and Prairie Stars Table Runner) and I wanted to be paid for one of my patterns. I have my first pattern up on craftsy and have even been favorited by someone. It's not a sale, but I'm sure it will come sooner or later.

Sunday, December 22, 2013

Prairie Stars Mug Rug

Don't you just hate it when you think you have a deadline and it turns out the deadline is really two days earlier? It seems to happen a lot around the holidays. At the beginning of the crafting season you start out with a plan and a schedule then you find out that the party where your gift will be opened is going to be earlier than the 25th. I thought I had until Monday to get these mug rugs finished. Last night I was checking facebook and one of my friends shared that I had a pattern published on moda. Boy was I shocked. Okay, so I knew that my Prairie Stars Table Runner was going to be published this month, but I thought my deadline was Monday. Sorry if you came here yesterday looking for this tutorial.

On the brighter side Moda's new Candy mini-charms make the perfect last minute Christmas gifts when those deadlines come zooming up. Wouldn't these mug rugs be a great gift with a nice variety of warm drink mixes? To make one mug rug you'll need (9) 2.5" squares. I chose to make mine with solids and used two black squares, three yellows, two dark blue, one white, and one light blue.


Set aside your center square (in my case the light blue one) and draw a diagonal line through the center of your light blocks. Match your dark and light blocks (2 yellow with 2 black, 1 blue with 1 white, and 1 blue with 1 yellow.) Sew a quarter inch seam on each side of your line and cut on your line. Press.


You will have four HST units for your corners (In this case yellow and black HSTs.) Cut your center squares (those blue ones) in half diagonally. Match one blue/white unit with a blue/yellow unit with blues opposite each other and sew. Press all of your blocks.

Your pieces should look something like this right now. Trim all of your squares to 1.5" square and sew together. This block finishes at 3" which is great if you're making a miniature quilt, but a little small for a coffee mug so I added some sashing.


 For sashing cut (2) 3.5"x1.5" strips and (2)1.5"x5" strips. Sew short pieces on opposite sides of block and then attach long pieces to remaining edges and trim block to 4.5". I did simple in the ditch quilting around the edge of each square to help the rug lay flat and used some left over binding from my table runner.  I definitely need a little more practice doing bindings on things this small. Since this is such a quick project though I can easily make up some more of these to practice on.

Wednesday, December 18, 2013

Fingerless Gloves

My Christmas projects are at a point right now that I'm very comfortable. (I'm not even sweating the fact that we're getting together with my parents and sister on the 23rd rather than the New Year's gathering I was hoping for.) Unfortunately everything is so close to being finished I can't share pictures of it. Earlier this month I got together with my family to celebrate my mom's birthday. Since I couldn't take the projects I was working on and wasn't going to I decided to cast on these Fingerless Gloves I've been drooling over. I'm using some more Imagination yarn from Knit Picks, this time in the Looking Glass colorway. I will admit that I messed up the cable pattern and had to rip back to restart, but it's such a fast thing that the ripping wasn't really that painful. I probably would have let the mistake stand if I could have figured out what I did so I could duplicate it for it's mate. Hopefully these will be finished by New Year's and then I can turn my attention back to the Green Sweater.


Since Ginny always asks what we're reading when she posts her Yarn Along I've decided to share a picture of the books that arrived in our house last week. I've loved the Cotton Patch Gospel musical for years. If you've never heard of it, Clarence Jordan writes a modern retelling of the New Testament set in rural Georgia. The musical follows the life of Christ, but the books go through most of the New Testament. (Unfortunately Clarence passed away before completing the project.) Some of it is a little dated if you aren't a baptist cotton farmer living in rural Georgia, but it's still a great way to look at the Bible.  I also love the picture created when you lay out all of the books.

Sunday, December 15, 2013

Writer's Block Drags On

I've got to learn not to name a quilt after a problem another creative field struggles with. In November I had my quilt top complete, went to a weekend workday hosted by my quilt guild and figured out the pieced backing. Sadly I went to lay the quilt out and discovered that my borders had more waves than the ocean. After ripping off the first border and cutting it according to the center measurement of the quilt rather than the edges (who knew quilt edges could lie) I discovered that the problem lay with the first pieced border I'd done. Originally I used my left over jelly roll strips to make an inner scrappy border, but it turns out my blocks are 7.75" rather than the 8" my border counted on. I've ripped off the first border (it's been put in time out and won't be allowed out until it agrees to play nice in a new project) and have decided to use just the solid border. Thankfully the quilt lays flat now and I was able to baste it pretty easily. My living room is a little cramped so I wasn't able to lay the whole quilt perfectly flat for basting, but I got half of it pinned and then rolled it and moved the other half to the wider floor space. 


Things were starting to look good for this quilt being finished before Christmas and my main machine jammed. I do have a second machine, but it doesn't have a cabinet with a nice flat bed and table to support the weight of the quilt. I'm hoping once my husband looks at the machine he'll figure out an easy fix and I can still use my main machine for quilting this thing. I might yet be able to get it under the tree this year.

Wednesday, December 11, 2013

Christmas Knitting

My Christmas projects are getting smaller which makes it harder to share without giving away exactly what I'm making. Since my husband has seen this hat in progress (and pictures of the finished pattern) I can share this gift. A little while ago I ordered some of KnitPicks Imagination sock yarn in Sasquatch. Unfortunately I didn't read the washing instructions before ordering the yarn and didn't find out it's hand wash only until it was here. I don't mind most knit things being hand wash only, but I just can't wrap my head around the idea of hand wash socks. Thanks to Ravelry I found this hat that knits up really quickly. Despite being hand wash only I'm really loving this yarn and its subtle color changes.


My husband requested the hat be long enough to comfortably fold and still cover his whole head. This was my car knitting during Thanksgiving so it might have gotten a little longer than intended. The pattern leaves it up to the knitter to decide how long to make the fold so this could be done with a single skein of sock yarn.


The hat is finished, but in order to keep some surprise in Christmas I'm waiting until the recipients have seen the finished gifts before sharing them here.

Saturday, December 7, 2013

Sioux Prairie Quilt Guild Christmas 2013

This week my quilt guild had our annual Christmas party. It's always one of my favorite parts of the holidays. We have a big potluck, play a few games, and exchange quilt related presents. 
When we arrived there were donuts sitting on our plates. All of us were a little confused and asking if we really wanted to eat a donut at 6:00 at night when we had a potluck of yummy salads and desserts awaiting us. Then we got closer to the tables and discovered that the donuts were really these super cute felt pincushions. Each of us also got a template for a 5" half hexagon! I've been wanting to play with this shape but haven't gotten a template or one of moda's precut hexie packs yet. The best part is that the half hexagon works with charm packs and jelly rolls which is one of the few things I actually have in my stash.


The games were very creative this year. We're a large group and fill several tables so that's how our teams were decided. Everyone had to take a needle and each team was given a spool of thread. We then raced to see which team could get all of their needles on the thread first. The ladies at my table have lightening fast threading abilities and I'm pleased to report we won!  Our prize was a fat quarter and I chose the blue fat quarter in the picture below. For the second game we had to bring a fat quarter to exchange. We got to choose a fat quarter from the basket and had to toss it into a tub a few feet away. You'd think it would be easy, but those fat quarters really catch air when you throw them. Thankfully everyone who missed (including me) got to choose a fat quarter from the basket at the end of the night and I got to bring home the lovely little black and white print.


The evening ended with our gift exchange. Since we're all quilters we wrap our gifts in fabric which is how I got the green fat quarter in the picture above. We drew numbers to decide the order we chose gifts in. From there we could either take a gift from the table or steal one of the gifts that had already been unwrapped. The stealing part is always nerve wracking because if you draw something good you don't want anyone else to take it, and you want your gift to be concerned good enough to be stolen. (I'm pleased to report that the table runner I made was stolen once!) I was nice and picked one of the wrapped gifts and got a great little box bag for carrying all of my tools to workshops/retreats/work nights and a charm pack of Bobbin and Bits. I'm loving this fabric line and I think it might be destined for some play time with my new hexagon template. 


One final note not related to the Christmas party, but still exciting. I recently found OttLite bulbs at JoAnns that fit in a regular lamp! I've wanted an OttLite for a while, but the ones that I can afford if I spend a year's worth of birthday and Christmas money are the "cheap" ugly plastic ones. They'd work okay in a craft room, but I do most of my hand work in our living room where I want something a little more stylish. The light bulbs are a bit pricey at ten dollars a bulb, but that's significantly cheaper than the lamps. It's been really nice having a great light for knitting (haven't done much quilting this week.) This morning while taking pictures for the blog I realized the true value of this light bulb. I'll admit I was feeling lazy today and decided to use my point and shoot camera for pictures instead of setting up my DSLR. I occasionally do this and then use photoshop to make the pictures look good. (I know it's not the best practice, but it's the lazy one.) Because of my awesome new light bulb I didn't need to do any editing on my pictures! If you're trying to figure out how to take good photos in the winter with the crummy light the northern hemisphere gets this time of year (or next June for those in the south) I'd definitely recommend investing in one of these bulbs.

*This post has not been sponsored by anyone. I find it challenging at times to find quality items and when I do I want to share my finds.

Saturday, November 30, 2013

Penguins on Parade

This post has been a very long time coming. Last winter I took a workshop on piecing the drunkard's path. Not being satisfied with any of the patterns I found I chose to create my own. After a great deal of encouragement and support from the women in my guild and the readers of my blog I have finally published my penguin quilt pattern! 


I can't believe how many penguins decorations I've seen this year. I love that the penguins in this quilt aren't Christmas themed so it's a quilt that can stay out all winter. The blocks for this quilt are 14" making for fast assembly. If you've never made a drunkard's path before don't panic. It's a very easy block and I walk you through how to assemble the sizes for both the penguins and the fish.


Friday, November 29, 2013

2013-14 Mystery Quilt Step 3

Sorry for the recent absence. I'm not really sure what bug hit our house, but it was not a nice one. Thankfully health has slowly been working it's way back in among us. 

Step 3 for the mystery quilt along is a very easy one. Take the 2" strips you cut in step 1 and strip piece them.  After you press you should have 5 sets that look something like this.


Next cut your strip sets into 3.5" blocks.


I told you step 3 was an easy one. Unfortunately the illness that hit our house prevented me from getting to the meeting where step 4 was handed out so this quilt might be headed for a little bit of a break. Probably a good thing since there are quilted Christmas projects that need some love.


Wednesday, November 20, 2013

Sleeves

I'm not sure why this amazes me since it tends to happen with every sweater. I moan and groan about the first sleeve and how much I hate sleeves, procrastinate as much as possible, and then when I finally finish the first sleeve and cast on for the second one things start flying. This weekend I actually finished the first sleeve.

Two days and one skein later I'm half way finished with the second sleeve. I'm not even worrying about the fact that this is my last undamaged skein of yarn (the other one got cut a little when opening the box) and even counting the damaged one and the half that's left from the first sleeve I only have two and a half skeins of yarn to finish this sweater. I've been floating back and forth, but right now I think I just might make it.

Saturday, November 16, 2013

2013-14 Mystery Quilt Step 2

Last week I shared Step 1 of the mystery quilt I'm currently participating in with my quilt guild. Not surprisingly this week I got to start sewing some of the pieces I cut in step 1. 

Using the (60) 4" squares of medium/dark2 and the (60) 4" squares of light fabric, make 120 half square triangles. Square up blocks to 3.5". 


I have to admit I am falling a bit behind. I have all of my squares sewn and pressed, but only have trimmed about 20. I also need to finish working on step 3 this weekend since I think they'll be passing out step 4 at Monday's meeting. Hopefully this weekend will see some good sewing time and I can get back on track.

Wednesday, November 13, 2013

Sleeve Update

I was wishing this morning that I lived in Harry Potter's world, or at least had the ability to wave a magic wand and have my knitting needles magically go at it and work themselves. It would be so lovely to have these sleeves finished and move on to the next thing on my Christmas to-do list. Then I remember that they sell sweaters in stores so clearly the reason I do this is not just for a finished sweater. I know that the recipient of this sweater will feel the love I've knit into the stitches. When he wears this sweater it will be like I'm wrapping him in a hug and he'll remember how very much he is loved. Thankfully he really likes me and won't acknowledge all of the frustrations and frogging that have also gone into this sweater. So, with 41 days left until Christmas (eek!) I think I'd better get back to knitting.


Saturday, November 9, 2013

2013-14 Mystery Quilt Step 1

I'm super excited with my quilting projects right now. Unfortunately I really can't talk about any of them right now so I hope you'll bear with me for a few weeks. One of the projects I can share is the Mystery Quilt I'm working on. Since I'm not sure how long my other secretive projects will take I'm going to release the steps one at a time. 

I talked with the ladies running the Sioux Prairie Quilt Guild's Mystery Quilt this year and have gotten permission to share the steps on here. The pattern is from http://www.quiltbug.com/Free/catercorner.htm (I'm keeping the mystery in this quilt so I haven't visited the site yet.) I was super excited to learn that this pattern is from the Cystic Fibrosis Foundation. One of my best friends has CF and is organizing her first Great Strides Walk in our home town next summer. Check out her blog Life of Cheriz for all the details. I haven't figured out all the details yet, but I think I'm going to raffle off this quilt somehow to raise money for her walk. Okay, enough of me babbling and on to the quilt. 

Clue #1
Fabric Requirements and Cutting Instructions
Light: 2 yards (may choose fabric to "fussy cut" on cutting instruction 2. If you choose to do this you                               will need more fabric)
Light/Medium: 3/4 yard
Medium/Dark 1:3/4 yard
Medium/Dark 2: 2 yards
Binding: 1/2 yard-this can be the same as the 2 yards of Medium/Dark fabric

All strips refer to Width of Fabric (WOF)

  • Cut 7 strips 3.5" wide by the WOF of the light/medium fabric. Subcut these strips into (74) 3.5" squares.
  • Cut 2 strips 3.5" wide by the WOF of the light fabric. Subcut these into (14) 3.5" squares. *These can be fussy cut if desired.
  • Cut 5 strips 2" wide by the WOF of the medium/dark 1 fabric.
  • Cut 5 strips 2" wide by the WOF of the light fabric.
  • Cut 6 strips 4" wide by the WOF of the medium/dark 2 fabric. Subcut these strips into (60) 4" squares.
  • Cut 5 strips 3.5" wide by the WOF of the light fabric. These will be used in the boarder.
  • Cut 6 strips 4" wide by the WOF of the medium/dark 2 fabric. These will be used in the second boarder.

All of my fabrics are Kona Solids. I'm using Wheat for my light, Lavender for my light/medium, Kiwi for my Medium/Dark 1 (I'm also planning on using this for the binding), and Dark Violet for my Medium/Dark 2. 

Unfortunately when I ordered my fabric I entered the correct amounts, but they only sent me 1/2 a yard of Lavender. I haven't decided yet if I'm making a smaller quilt, substituting another fabric, or ordering more Lavender. I'll probably make that decision as I get more steps and see how things are looking.

Tuesday, November 5, 2013

Sweater Sleeves and Peeps

 Immediately after finishing last week's entry I realized my dreams of ripping back to the cuff just weren't going to cut it and I ripped the whole sleeve. Really annoying, but I'm very glad that I did it. I'm so much happier with how things are looking this time.


I've been doing a loop for my increases instead of lifting the bar below and it's been working beautifully. I love how nicely and evenly everything is branching off. It took me a few days to really get back to the sleeve but I'm a lot happier with it now which means progress is going a lot faster.


 A few weeks ago I wrote about the Halloween box my mother-in-law sent me. (It was a wonderful day when a box of fabric and a box of Halloween candy arrived at the same time.) At the time I hadn't broken into the Halloween peeps that were in the candy box so I wasn't able to share a picture. I can now happily report that the peeps have been opened and enjoyed, but before devouring this cute little guy I was able to get a quick picture. You can see how he could push the Halloween box into the lead for excitement levels.

Tuesday, October 29, 2013

Predictable Progress

As predicted the sweater sleeve has experienced a frogging. I was able to save the first three inches so it wasn't quite as painful as I anticipated it being. I'm not sure what I did but if you look closely about half way down the sleeve on the left side there's a wonky bit. It doesn't look too horrible in the picture, but it was very wonky in person. I was hoping that it would get better as I worked, but every round the wonkiness became more and more obvious.


I also noticed the the increases I was using were leaving large holes in my knitting. This is the first piece where I've ever had to do increases on a purl row. My preferred increase is to knit in the front and back of the stitch and if the pattern doesn't let me do that I lift the bar between two stitches and knit (or in this case purl) into the bar. For some odd reason the lifted bars left big holes this time. I'm still pretty sure that it should work knitting this sleeve in the round. Hopefully next week I'll have better progress to report.

Sunday, October 27, 2013

Blogger's Quilt Festival Fall 2013

This summer I was honored to be featured on the Moda Bakeshop. Since Christmas is less than 60 days away I decided to enter my quilt Into the Woods in the Fall 2013 Blogger's Quilt Festival.


The pattern features pieced trees and a variation of the split rail block. As I was figuring out how to lay out this quilt my husband suggested using my light fabrics in the center of the blocks so that it looks like snow flakes. I absolutely love the effect it creates.


The quilt finishes 70"x56". For the binding I chose a sugar cookie print. It's so much fun to see all of the cookies wrapping around the edge of the quilt.

I have a weakness when it comes to hot cocoa. It's my comfort food year round. When I saw fabric covered in hot cocoa I knew it needed to have a huge role in my quilt and so I chose this fabric for the background, and used the extra pieces from the jellyrolls to add a small pieced embellishment.


For the label I cut one of the extra blocks on point and did sashing with one of the extra jellyroll pieces.


Head on over to Amy's blog and check out all of the amazing quilts.

AmysCreativeSide

Saturday, October 26, 2013

New Fabric

Thursday was such a happy day. I got a box of fabric from Fat Quarter Shop for two quilts and a box from my MIL full of Halloween goodies. My excitement level was about equal with the fabric box coming out slightly ahead (come on, it's 5.7 pounds of fabric.) When I got home from work my husband and I were digging through the boxes and discovered she sent us individually wrapped peeps!!! I didn't even know they made Halloween peeps let alone individually wrapped ones. The glare on the wrappers is too harsh so there's no pictures of them. :-(

Happily the fabric has no glare so I can share photos of what I got. Every year my quilt guild does a challenge and a mystery quilt. This year they even let me plan the challenge quilt! I might be driving some of them a bit nuts with my loose rules, but I want everyone to have fun. When I announced the challenge I handed out paint chips and participants must find fabrics that match at least three of the colors on their paint chips. Fabrics can be prints so long as the colors on their prints match the colors on their paint chips. We're also able to use neutrals such as black, white, and grey. 

I'm not completely sold on the two fabrics furthest to the right. They lean a little more towards the red scale than the purpley pink I was hoping for. I've decided one of the things I'm adding to my Christmas list is a color card from Kona. I'm really embracing using solids and can't wait to get a swatch of all of fabric colors Kona offers.

I attempted to participate in the mystery quilt along the first year I joined the guild. I did okay with altering the fabric (i did a two-step process of bleaching and then when it was too light coffee stain), embellishing the fabric with quilting, cutting the fabric into seven pieces and reassembling, and adding beads and buttons. My mystery quilt was turning into this cute little bookcase runner with 7 owls. Then the last step instructed us to turn our fabric into a vessel. I couldn't figure out how to turn my bookcase runner into a vessel and the beading on my owl wings was becoming ridiculous. My owl runner currently languishes in UFO purgatory. I have trouble calling projects UFO because in my mind if I intend to finish it and have a plan of when it will be worked back into the schedule/finished it's still a WIP. To refer to the owl runner as a UFO tells you that their hopes of being finished are zilch. 

This year's mystery quilt we've already been told will finish as a quilt. Our guild makes Comfort Quilts for the DA to hand out to victims of violent crimes and their families, and to an organization that assists women and children leaving domestic violence situations. This year's organizers have planned a quilt that will finish 50"x76" which is one of the requested sizes for comfort quilts. We aren't required to give away our quilts, but I've decided my mystery quilt this year will be a Comfort Quilt. 


I forgot to ask when they handed out the first step, but I'll talk to the organizers of the Mystery Quilt and see if I can share the steps here.

Wednesday, October 23, 2013

Christmas Sock Update

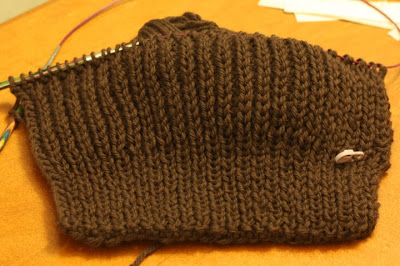
I'm really pleased with how well the Brown Blob is progressing. I've finished the left front so all that's left now is the sleeves. I've also made the bold decision to go off pattern for the sleeves. (Cue the ominous music.) It's really not that big of an alteration and probably isn't even worth mentioning. I hate seams so I'm knitting the sleeves in the round rather than flat. I know knitters do this kind of thing all the time but my inner knitter is sitting back with a smug look reminding me that she reserves the right to say, "I told you so" when I'm ripping out the sleeve next week. 

I've also been somewhat successful at having two projects going at once right now. The Brown Blob is getting most of the attention, but between each piece of the blob I've been putting in a few rows on my Kingpin Socks. I didn't want to count stitches for the heel in the car so I cast on for the second leg. Then a couple weeks later I ended up taking these with me to the Des Moines quilt show and still worked on the heel in the car. I did okay until it came time to picking up stitches for the gusset. Definitely not a car activity. Thankfully I've had some knitting time outside of the car lately and have gotten the first heel and gusset completed. I'm trying to stay even with the socks so I've started working on the heel flap on the second sock. I've heard of knitters doing socks this way to avoid second sock syndrome, but since I've never struggled with that I don't foresee knitting two socks at the same time very often.


Sunday, October 20, 2013

Swiss Cheese and Spiders

Last weekend I was watching Fons and Porter and they talked about quilting with spiders. Not being fond of the 8 legged creatures this got my attention because I needed to know if it was time to change the channel. Thankfully a quilting spider has very little relation to the nasty arachnids so I was able to continue watching. (Have I mentioned yet that I really hate spiders?) In quilting a spider is a scrap of fabric used for stopping and starting your sewing. This eliminates all of those strings that get left on the back of your quilt trimmed at the end. Because the fabric scrap gets sewed on several times it winds up with little strings hanging off it looking like legs. If I was more organized I could see having small squares that I'm constantly feeding through at the beginning and end of my rows that eventually get sewn into a quilt, but at this point in time I like the use of spiders.


Last winter I took a workshop with my quilt guild and one of the members asked another member if she was going to Swiss cheese her quilt. I'll admit I've only been quilting for a few years, but Swiss cheese was not a term I'd encountered. Sadly it has nothing to do with the snack you nibble on while quilting. Instead it involves chain piecing your rows so that when you've got all of your rows assembled the rows are all connected.


To do this you sew block 1 and 2 from row 1 together, then blocks 1 and 2 from row 2, and continue until you have all of the first two blocks sewn together. Starting at row 1 you attach block 3 from row one and work down the rows until all of block 3 has been attached. You continue in this manner until you've sewn all of the blocks to your row. You're quilt will look something like Swiss cheese at this point in time. Leaving all of the threads between your rows from the chain piecing you sew your rows together.

If you're anything like me you might be wondering when you'll need to use such a complicated form of sewing. (After I finished adding block 3 things clicked and were slightly less confusing.) The quilt I'm currently working on has a very specific pattern that requires each block to be in a very specific location with only one correct orientation. By sewing the top together using the Swiss cheese method it was much easier for me to make sure my blocks were facing the correct way and I sewed everything together in the right order.


This quilt is a memorial quilt for the dog we had to put to sleep last spring. Next week I'm taking a workshop on hand applique and will be adding some rainbow colored paw prints.

Wednesday, October 16, 2013

Sweater in a month?

I've read in years past about knitters who commit to knitting an entire sweater, start to finish, in the month of November. This crazy event has been dubbed NaNoSweMo or National Sweater Knitting Month. It's the knitting response to NaNoWriMo or National Novel Writing Month where participants are encouraged to write a 50,000 word novel in a month. I've always thought it would be fun to participate in, but never thought I'd actually be able to do it. This week as I cast on the left front of this cardigan I realized that it's entirely possible I will finish this sweater in 30 days. That said, I probably won't. I have no intention of pushing myself hard to finish this by October 25 (a month from when the sweater showed up on my blog) or by October 31. If I really intended to finish this sweater in a month I needed to commit to that before starting. 


That said there is still a crazy little voice in my head telling me I can finish the brown blob by Halloween and I have a lovely blue yarn in my stash waiting to become a cardigan that could be knit up in a month. Must keep reminding myself that this sweater is only the first Christmas gift on the list, another sweater is not on the list and cannot be on the list, and there are still lots of little projects left to knit. I also have to keep reminding myself of my promise to the green sweater that she would get finished. I'm really hopeful that I can dedicate November knitting to all of the little Christmas projects and then in December I can work on the green sweater as a Christmas present for myself.

Saturday, October 12, 2013

Quilt Show Memories

Last weekend I got to go to the AQS Quilt Show in Des Moines. This was my first international quilt show and I wasn't quite sure what to expect. According to the website there are over 1600 quilts on display. I meant to take pictures, but was so awestruck by everything that when I got home I discovered I'd only taken five pictures. Worse; none of them were quilts that had inspired the plans I was developing as I headed home. A couple of the quilts on display were set on black backgrounds. I loved how the dark background made the colors jump off of the quilt. My quilt guild's challenge this year is to take at least three colors from a paint chip and make a quilt using only those colors and neutrals. I was already toying with the idea of a black background, but after seeing those quilts I am definitely using black in my paint chip quilt.

One of the exhibits featured miniature quilts. I've seen lots of bloggers making miniatures/doll quilts, but they are nothing like what was on display. These quilts followed the standard rules of 24" or smaller, blocks that are 4" or smaller, but they took the or smaller bit to the extreme. There was a double wedding ring quilt that couldn't have been more than 8" wide and 12" long, still featuring at least 12 full ring blocks with the same number of pieces you'd expect in a large wedding ring quilt. There were log cabins with pieces no more than 1/4" wide. Not only did these quilters (both women and men) work with teeny tiny pieces, they have precision I struggle to accomplish on full size quilts. One of the more experienced quilters I was with said that they use paper piecing to make the small blocks. After finding out that EQ7 lets you print your own paper piecing patterns I've started laying out my own miniature quilt. There are a couple of projects that need to be finished first so I probably won't start sewing the miniature until January, but I have big plans for some small quilts.

In addition to seeing the amazing quilts we also visited the vendors' booths. I was overwhelmed by all of the choices. I found these cute little fat quarters that are destined to become a wall hanging for one of the people on my Christmas list. I'm not sure if the Scotties will make it on the front of the quilt or not, but they were too cute to leave behind.


Wednesday, October 9, 2013

Distractions

This week my sweater is not as far as I wish it was. Saturday I had the opportunity to go to Des Moines for the AQS Quilt Show. We left at 6 in the morning and didn't get back until 11 at night. Not much knitting time, but the inspiration I got from all of the quilts was worth it. Sunday I curled up with Round Robin by Jennifer Chiaverini. I intended to just read a chapter or two, but it was so good I ended up reading the whole book. I have a quilt I need to get ready for a workshop I'm taking at the end of this month so I'm not making promises as to how much knitting will get done this week either. (This is the real reason that I start knitting for Christmas in September. I have time to get distracted by other projects and still stand a decent chance of having presents finished by the 25th.)

Wednesday, October 2, 2013

Waiting until morning

Saturday I was happily working away at the brown blob. Close to bedtime I looked down and four rows back I somehow switched my pattern and ended up with about four inches of purls on the left side.


I told my husband I'd see how things looked in the morning. His loving response, "What do you mean you'll see how it looks in the morning? It will still be wrong." Sadly he was correct, the sweater was still wrong in the morning. However in the morning I had remembered the whole trick of dropping a stitch down row by row and using a crochet hook to bring it back up the right way. It was annoying, but far less painful than frogging four rows of knitting. Sunday afternoon I finished up the back of the sweater.


I cast on for the right side of the cardigan. Three inches later I remembered that the k1p1 rib includes a knit stitch at the start and end of the row before the k1p1 rib. Thankfully this sweater is going really fast so it was only an hour or so later that I had the second piece set up properly and began working the Shaker Rib.


Sunday, September 29, 2013

Writer's Block Continues

Perhaps it wasn't such a great idea to design a quilt around the concept of writer's block. When my husband suggested the name after I brought home the fabric I fell in love instantly and my brain immediately started thinking of how to design a quilt around it. This week I've had nothing but frustrations with this quilt. After I began attaching the first of the white strips I discovered that my 6.5" blocks were really 6.75". A quarter inch feels so small until it's there or not there. I was good and picked out all of the stitches, trimmed the blocks (again) and did it right. I was hoping to have the blocks finished (possibly even sewn into a top) but life has yet again gotten in the way. 

There's one more step before I sew the blocks into rows, but I wanted an idea of what the quilt will look like. 

Does anyone recognize this pattern? My quilt was inspired by one I saw online, but now I can't find it. I would really love to know who made the original so I can give credit.