Wednesday, February 27, 2013

New Sweater!

Before Christmas I fell in love with KnitPicks Fogarty Creek Blazer. I was busy working on Christmas presents so I promised myself as soon as Christmas was over I'd cast it on for myself. 

We went to my parent's house the weekend after Christmas and I brought this sweater. I excitedly cast on and worked the first ten rows of stockinette. Then I got to the chart. I've been knitting for a few years, but charts are still very new and very confusing. I spent much of the night trying to figure out what all of those stupid symbols meant and why they'd put symbols in the key that were close to what was on my chart, but not exactly. My family tried to figure it out, but nothing worked. The next day I woke up with the flu and decided to put the sweater on hold in favor of the 13.5" of stockinette on the purple monster. After a month the purple monster was dead finished. (Although it still needs sleeves, but we're ignoring that.) I had a quick gift come up, more will come on that after it's been given, and then I was free to start this sweater again.

During my illness I occasionally studied the chart and discovered I was trying to read it sideways. Now that I knew how to hold the chart I figured I was home free. (Insert crowd laughter here.) I got a few inches and my knitting looked like this. (It's hard to see in the picture, but that horseshoe shaped piece at the end is supposed to form a nice little oval.)

I ripped it out. I questioned my intelligence as a knitter and my self worth (kept thinking of all of those little children that have historically learned to knit before reading who would be able to handle this.) Assured my husband that I really do love knitting and he can't throw away my yarn. Thought some more about those stupid little kids and then realized my error. Those children (at least the ones in my mind) learned knitting before reading so they didn't question reading a chart right to left. Unlike those brilliant little children I've been reading since before I can remember so I automatically started at the left of the chart. I grabbed a fresh skein of yarn, started at the right side of the pattern (at least I've been starting at the bottom of the chart since the beginning so I can avoid ripping everything out a third time) and now my sleeve looks like this.


Linking up here:


Saturday, February 23, 2013

Drunkard's Path Sewing Guide part 2

Last week I showed how to make the 7.5" drunkard's path blocks for my penguin quilt. This week I'm going to show you how to make the 3.5" block. (Please note that the block I showed you last week uses the same techniques you'll use for the larger blocks, but was for a separate quilt. In the penguin quilt the 7.5" blocks are penguins and the 3.5" blocks are fish.)

The technique for the smaller block is fairly similar to the ones used for the larger block, but there are a few differences. Since the block is so small there's no need to pin at the middle. The horseshoe piece goes on bottom and the pie piece goes on top. Begin by matching up the starting ends and doing a few stitches.


 Just like with the larger block, straighten out the block as you sew so that when the seam passes under the needle it's a straight line. You'll tug the top piece a little to make this happen, but be careful about tugging too much. Because the curve is cut on the bias it has a lot of stretch and your ends won't match if you tug too much.


Because of the size of these blocks getting the two pieces lined up was a challenge at the end. I found a pair of tweezers were great for finishing out the seams. (Some of the ladies at the workshop used tweezers on the bigger blocks too, but I didn't find that to be necessary.)


Alternate the direction you press so that your seams will nest. (I pressed the tail and head towards the white and the back and belly towards the blue.) This block hasn't been stitched but it gives you an idea of how the fish will look.


Since I neglected to share my penguins last week here's one of them. Four fish blocks equal one penguin.


Tuesday, February 19, 2013

Sock it to Me Week 7

I'm pleased to announce the completion of the first pair of socks in the year of socks! (We're just going to ignore the fact that these are February's sock and January is still waiting patiently in the front pocket of my knitting bag.)


I was so excited by how well I got the strips to match. I really need to get into the practice of starting striped yarn at a color change so then my strips will easily match up. (Of course when the yarn company decides to randomly repeat three strips of colors it throws off all of your planning. If you look closely you'll notice the purple strips stripy bit repeats itself on the right sock. Grrr.)


Linking up here:


Sunday, February 17, 2013

Drunkard's Path Sewing Guide part 1

The technique for sewing the 7.5" blocks and 3.5" blocks are slightly different. At the workshop our teacher began with the larger block so I'm going to start with that one. There is a little bit of a learning curve with sewing curves, but just go slow and the method will click pretty quickly. Unfortunately I was too caught up in figuring out what I was doing to remember to take pictures. Luckily one of the guys I work for celebrated his 60th birthday over the weekend and he just happens to love fish. I decided to make him a wall hanging featuring the drunkard's path fish. 


The first step is to fold the pie piece and horse shoe piece in half and finger press a small crease at the top.

Match up the two creases and pin.


Our quilt teacher taught us that we only need the one pin in the middle that moves to the end half way through sewing. I found it easier to have both pins in place right from the start. (I've seen tutorials online that use a lot more pins than this, but it's really not necessary.)


One of the major secrets of sewing the drunkard's path block is having the horseshoe side down. (I think of it as iron horseshoes weigh more than a piece of pie so they sink to the bottom. Please note that from this point on the horse shoe is in the red fabric and the pie is blue.)


When sewing this block, pull the seam so that it's straight when it's fed through the needle. You will pull the top piece a little to make sure that they match up in the middle. Make sure that the fabric going under the needle is flat and smooth. Puckers will keep your seam from laying flat and won't look good in the finished quilt. (It's a good idea to cut a few extra pieces. This is a more challenging block and you're going to mess up the seam allowance and sew puckers. A seam ripper is good for the first mistake, but the third time ripping out the seam it's easier to just start over.) 


I found that these blocks come out much more wrinkled than when I sew squares or triangles, but ironing will fix everything.


Ironing rules are the basic quilting ones. Alternate pressing seams towards the pie or towards the horseshoe, going towards the dark when possible. Ordinarily when I iron I don't use anything special, but for this block I found best press makes a huge difference in how these blocks look.


I added half square triangles to make this wall hanging size (it finishes 20"x20".) My machine has a cool stitch that looks like waves and was perfect for quilting. On the penguin quilt I did applique eyes, but since there's only one fish and this isn't going on a bed I used a button for the eye. 

I've named this quilt "The Big One."


Tuesday, February 12, 2013

Sock It to Me week 6

I realized Sunday evening that Valentine's Day is on Thursday. The DH and I have already decided not to do anything big for V-day so there's no pressure to find a gift that he doesn't really need or want. I was all set to enjoy Thursday as a normal day and finish it off with a nice meal when I realized that I had plans of wearing my February socks on Valentine's Day. Since I'm not a pirate with a peg leg (and let's face it, what self respecting pirate would want a pink and purple sock?) I've decided to focus all of my crafting energy on getting the second February sock done before I get dressed Thursday morning. 


I've got 4 of the 6 inches on the leg finished, so I may actually get this sock done by Thursday morning.

Saturday, February 9, 2013

Drunkard's Path Cutting Guide

Cutting out the Drunkard's Path block is really pretty simple. There are two tools that will save you much frustration. I strongly encourage investing in a rotating cutting mat and a 28mm rotary cutter. (I used a 45mm cutter to do the 7.5" blocks, but it was impossible to do the horseshoe bits on the 3.5" blocks. I almost kissed one of the ladies when she lent me her cutter.) My rotary cutting skills are not always accurate so I cut my strips of fabric half an inch wider than my templates and then trimmed them to size. Due to the layout of this quilt I didn't need horseshoe and pie pieces that were the same color. This layout does waste a bit of fabric, but with some careful cutting the waste is very minimal.

To cut the horseshoe shapes I folded my fabric to fit two horseshoes nestled together. (Ended up being 12" strips for the 7.5" horseshoe piece.) There's a little bit of extra space so don't worry too much about cutting an inch or so past the edges of the templates.


With a sharp blade I found that I could easily do four layers of fabric at a time. It worked best to cut the flat sides first and then anchor the template by holding a finger on each side of the square. (It's not as complicated as it sounds, but since I'm not an octopus I wasn't able to get a picture of me doing this.) The picture below shows how the two pieces nestle together once the extra fabric is removed.


To cut my pie shaped pieces I cut squares half an inch larger than my pie piece. (For the 7.5" templates the edge of the pie is 6" and my square was 6.5") When I did my 3.5" pie pieces I cut straight from the strips. The curve makes it impossible to nest these pieces the way I did for the horseshoe so I just kept the straight edge facing the same direction across the strip. 


Your horseshoes and pie pieces won't line up perfectly. It's okay. The magic of sewing curved seams will fix this in the next step.


Tuesday, February 5, 2013

Sock it to Me Week 5

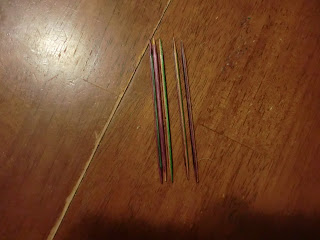
My sock needles are looking very sad right now.


That's right. They're empty. This week I've been distracted by lots. I showed you the penguin quilt this weekend, but that is just one of the things distracting me. I've started clearing out the yarn stash by making baby hats. 

Judging from how slowly the hat is going (more so how little attention I'm giving it) this may not be the best plan for downsizing the stash. Most of my knitting time is going into the purple monster.

Have I mentioned lately that this sweater has 13.5 inches of knit stitches one after another after another? I just hit 11 inches and the prospect of finishing in 2.5 inches is very motivating. I'm trying to decide if I want to do 1.5 inches of that as ribbing for the bottom or do a turned hemmed which will require me to knit an extra 2 inches in a contrasting color and then turn the hem and bind the live stitches to the back side. (Yes, that sounds complicated to me too so I'll probably do the ribbing option.) You may have noticed that this sweater has no sleeves, but it has been decided that when my needles are free this sweater is going to have some time out in the stash while I move on to my green sweater that's full of lots of fun cables. Eventually the joy of cables will wear off and the idea of straight stockinette sleeves will feel like a break rather than a chore. When that happens I'll spend a week or two making sleeves and then will get the joy of a quick finish.

The last distraction has been quilting related.

Before Christmas I was spending more time on the pinwheel quilt than Christmas presents so it got banished to the closet so I could focus better on the stuff on a timeline. My quilt guild's show is 15 weeks away. Sounds like plenty of time, doesn't it? Then I realized that before the show I want to finish hand quilting the pinwheel quilt, machine quilt Coffee Lover, finish and quilt Hobbit, finish Penguins (although since that quilt is a workshop quilt I am allowed to display the top unquilted) and possibly do the Challenge quilt (a modern 5'x7' quilt in solids that is machine quilted by the quilter.) Suddenly 15 weeks does not seem like much time at all.


Sunday, February 3, 2013

Penguin Quilt

This year my quilt guild's winter workshop featured the Drunkard's Path block. I think the reason it's called the Drunkard's Path is because who ever came up with this block was very familiar with that particular path, if you catch my meaning. (I think it also helps the quilter if she's a little familiar with that path, or at least the bottle at the start of that path.) Once I figured out what I was doing it did start to get fun. I'm getting ahead of myself though, so lets back up and start at the beginning.

Here are my fabric choices for the quilt. As the name suggests the black and white fabrics will become penguins on the dark blue. The orange will be used as beaks and binding. The dark blue will also be used to make fish which will be on the white. All of these blocks will be on point alternating with solid, light blue squares.


 I forgot to take a picture of the black before I cut into it which is why it looks like there's so much less of it. You might be wondering why there's so much black fabric left if I've already cut all of my blocks. In December my husband gave me EQ7 (computer software for designing quilts.) I had several mock-ups of my penguin quilt before deciding on the final layout. One of the nice aspects of the software is that it gives you a yardage estimate for the quilt. I've never made a queen size quilt and I know that the Drunkard's Path block wastes a bit of fabric so I decided to trust the software when it told me to buy 18 yards of fabric. (Yes, I thought this may be a bit much but I frequently regret it when I don't trust the pattern so I did.) After cutting out all of my blocks I realized that I'd only used half of my fabric. Turns out that if you have two quilt tops in your project file EQ7 assumes you want to make both quilt tops. I think I'm going to figure out a way to use the extra fabric for the backing of this quilt.

I think rather than calling this quilt Penguin quilt (which is a working title, when it's finished it will be named Feeding Time) I should call it Comedy of Errors. So far I've had at least one problem in every step. At the workshop was the worst. My machine started growling at me at about 10 am and when I got back to lunch it began clunking and then stopping. I frequently have conversations with Jenny (my sewing machine) about proper behavior. I give her regular brushings and make sure all of her parts are in order, but lately she's been complaining more and more. Because of where I live, my work hours, and the hours of the shops around here it will mean sacrificing two entire Saturdays to take Jenny to the repair man and get her back. I am making plans for this trip, but my husband and I have been contemplating getting a second machine for several months now. Yesterday I decided it was time for Jenny to meet her new little Brother, Samuel, Sammy for short. 

Sammy comes equipped with multiple feet for quilting, an extension table for quilting, and over 100 different stitches, including a basic alphabet that I suspect will come in useful when I make quilt labels. I plan on playing sewing with this machine a lot in the next few weeks as I work on the penguin quilt. When I finish the  quilt top I'll do a proper review of Sammy.